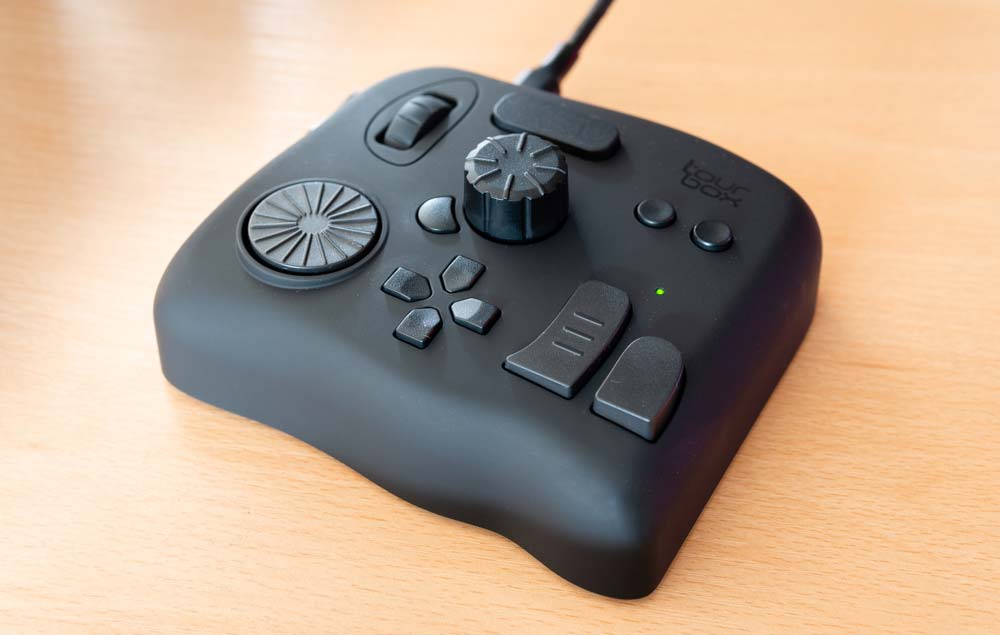
Photographers are constantly looking for ways to speed up their editing workflow, and in recent years consoles and controllers have been released to help to achieve this. Not to mention to provide a more intuitive and natural way of accessing and controlling settings. The TourBox is a cost-effective and easy to use controller for Lightroom and Photoshop, as well as other photo and video editing software, but does it have what it takes to help you to speed up your photo editing?
About the TourBox controller
The TourBox is a palm-size controller for Mac and PC designed to assist with photo and video editing using software such as Photoshop, Lightroom, Illustrator Affinity Photo and Capture One, drawing software, like Clip Studio Paint, Comic Studio and SAI, or video and audio editing software including Final Cut Pro, Premiere, After Effects, DaVinci Resolve, Audition and C4D.
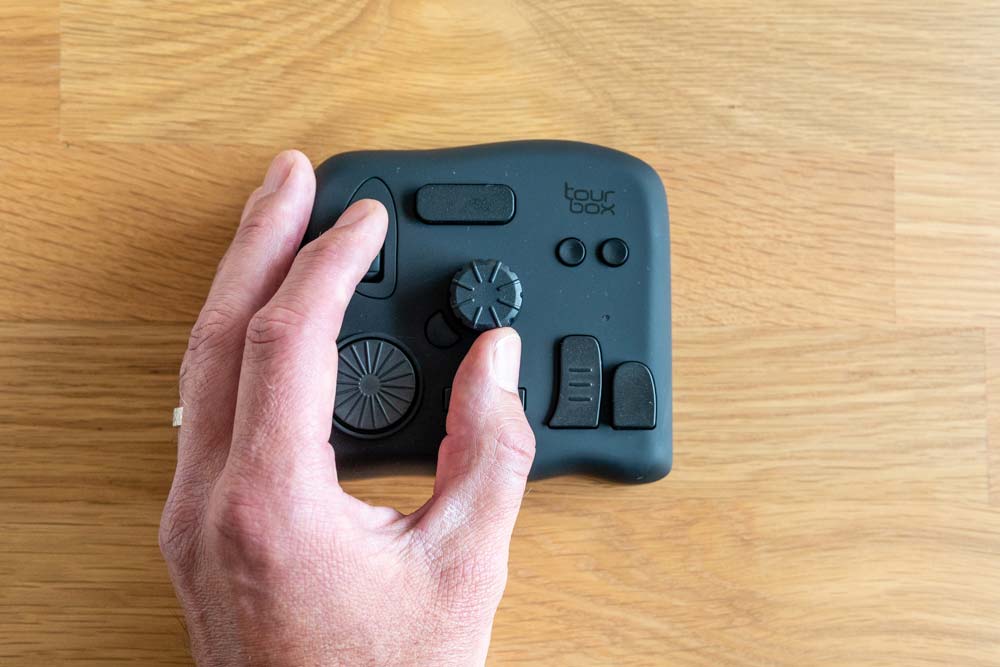
The idea behind the device is that it replaces your keyboard and speeds up the process of controlling brush size, hardness and opacity etc, you can select and control tools and sliders as well as performing other tasks without the need to learn keyboard shortcuts. In Lightroom, you can use the keys and dials to activate specific sliders, or simply hover the mouse over sliders and use the dial to control them.
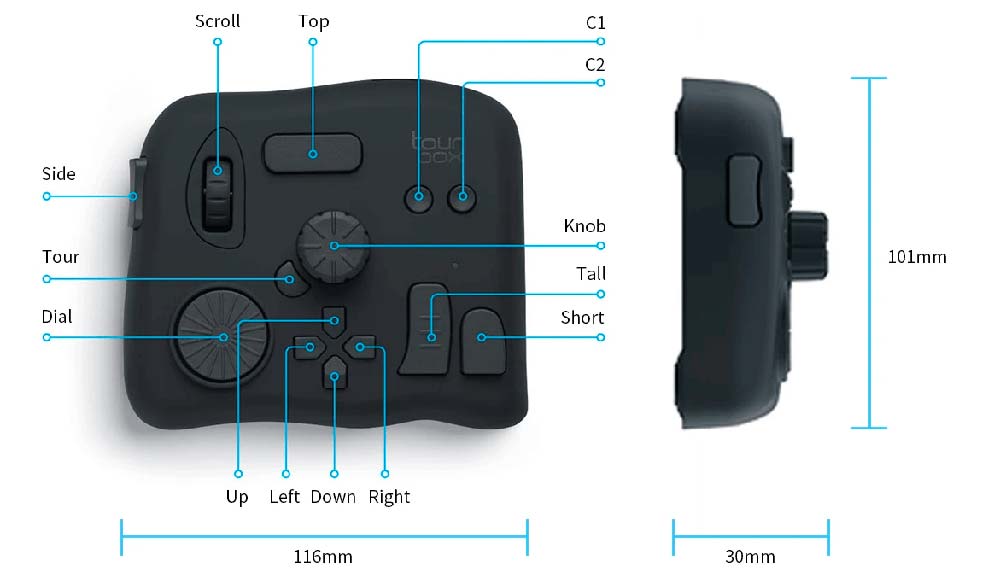
The TourBox is a 116x101x30mm USB device that weighs just 370g. Build quality is solid with a high-quality braided USB cable. It’s controlled with one hand, with a comfortable button and dial layout, while the other hand controls a mouse or a graphics tablet, and it’s this that can speed up editing because both hands are working independently rather than you needing to stop using the mouse or graphics tablet to access a two-handed keyboard shortcut.
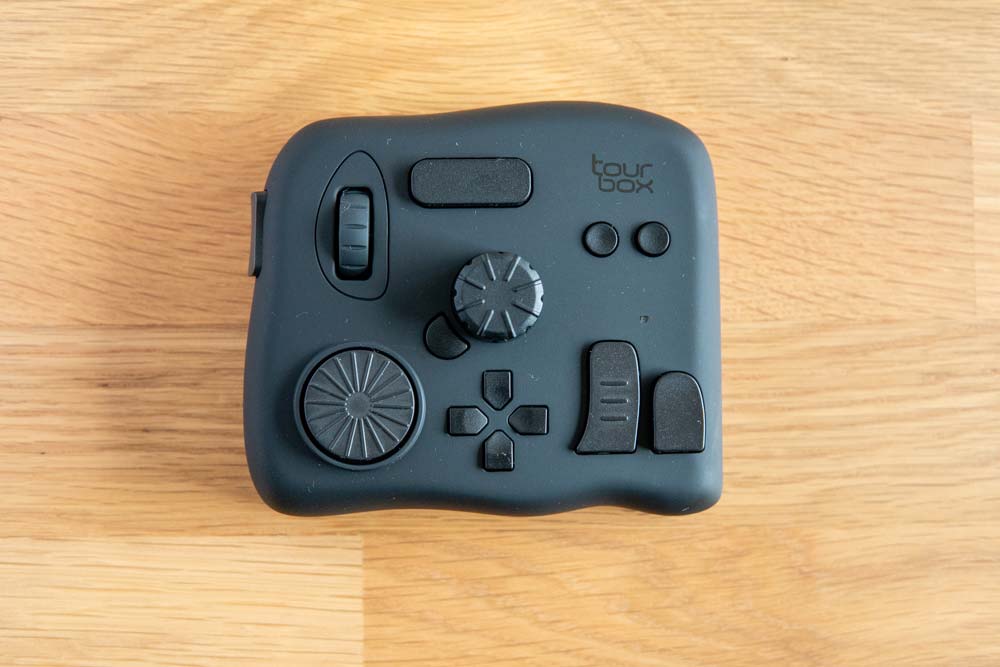
The TourBox controller offers 14 controls in total; three of these are rotating dials – one is like a mouse wheel with a button press, the second is a dial in the centre of the device and the third a wheel. The remaining 11 controls are clickable buttons including four that make up a D-pad, and all can be mapped using presets or with manual configuration. The dials would be better with a little more resistance, and the larger buttons could be the rocker type to provide a click at each end, but this certainly isn’t a problem.
If this type of device sounds familiar, it’s because Loupedeck and Palette Gear perform the same tasks but the design of all three products is different despite providing the same kind of functionality. At the time of writing, the TourBox costs just $169/£127 (currently on sale from $190/£143), and free worldwide shipping is included, so the Tourbox is least expensive of the three options.
The controller in use
The TourBox comes with Lightroom and Photoshop presets built-in, and you can download and install additional presets created by Tourbox and other users from the TourBox website. You can customise these presets to your liking or create your own unique presets that fit your workflow. You can map any shortcut or tool available within compatible editing software.
Installing presets from the TourBox website isn’t as intuitive as it could be at first, but the Tourbox YouTube channel provides a tutorial along with several other tutorials. You can also set the console up to automatically switch between software presets depending on the software being used, but to set this up the preset must be installed and the software running in the background.
There’s no denying that the device takes a little getting used to, but once you do the device works well alongside your mouse or tablet and can certainly replace your keyboard for many, but not all keyboard tasks during editing. The key to success is to take the installed Lightroom and Photoshop presets and then customise them to your liking.
If you use a keyboard and shortcuts, it feels counter-intuitive to use the TourBox at first because it seems like it takes longer to find specific tools and shortcuts. But as you become accustomed to the button set-up and how the TourBox works, you quickly begin to speed up. And the fact that you can keep one hand on your mouse or pen/tablet, and one on the TourBox certainly makes editing ultimately more efficient.
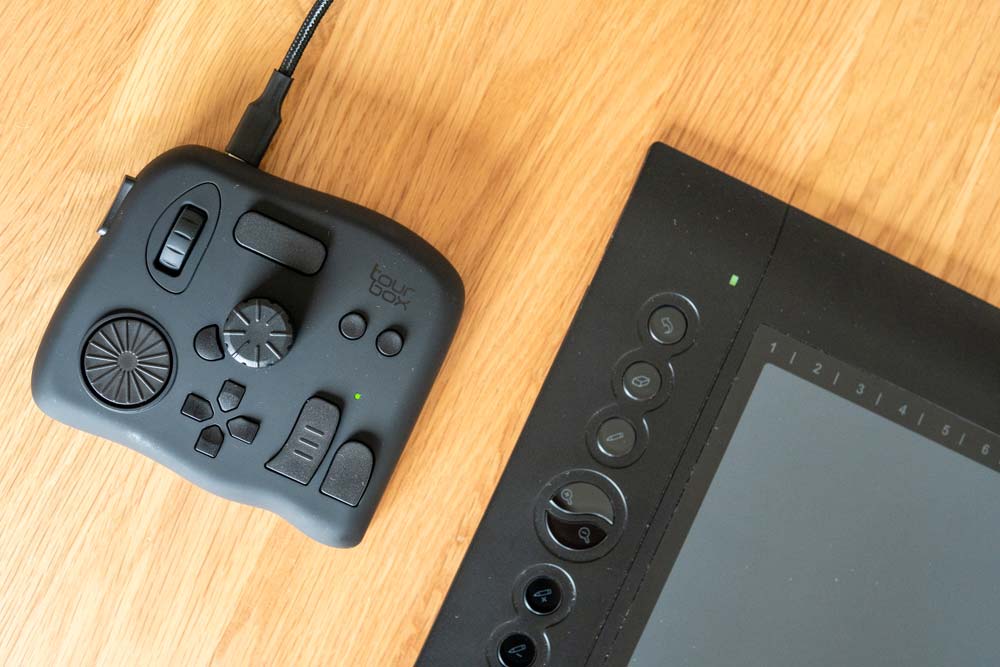
The device is most useful with a tablet where the keyboard is often placed in behind it, which can make it difficult and uncomfortable to reach it to use shortcuts or modifier keys. If you use a mouse most of the time alongside a keyboard it’s less useful, but certainly provides a more intuitive and fluid approach to controlling certain tools and settings.
TourBox Console
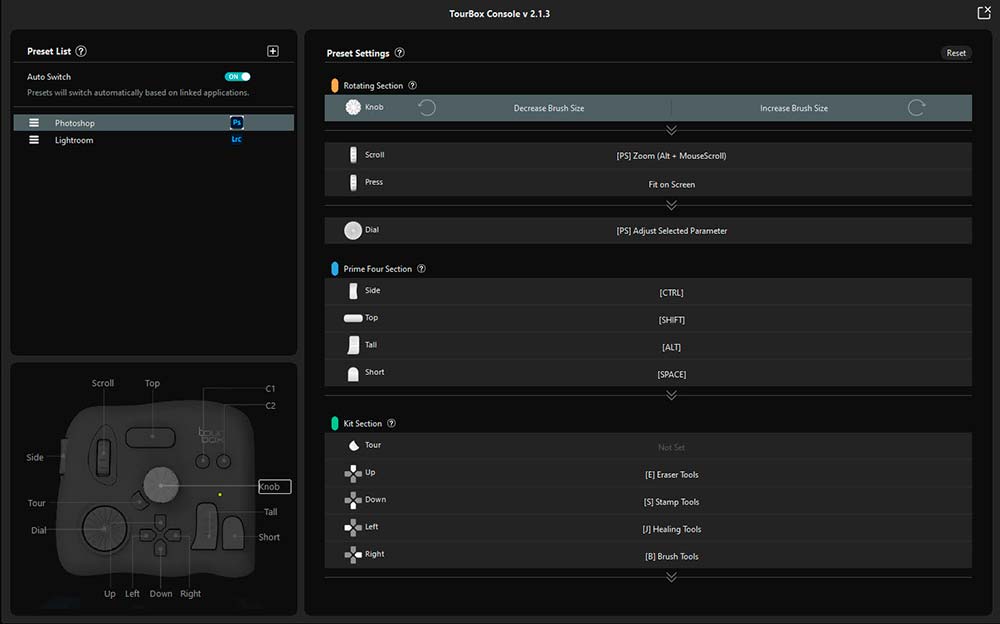
In the Console, which is the software and driver for the device, you can set presets, select shortcuts, functions and tools from a list or use your keyboard to set shortcuts. The interface is well laid out and is generally easy to use, and frequent updates are constantly improving its usability and functionality.
One frustrating aspect of the Console is that if you minimise it, the only way you seem to be able to access the control panel again is to unplug the TourBox from your computer and plug back in. Double-clicking on the Console shortcut on the Desktop doesn’t reopen the Console, so adding this basic functionality would be welcome in an update.
The HUD
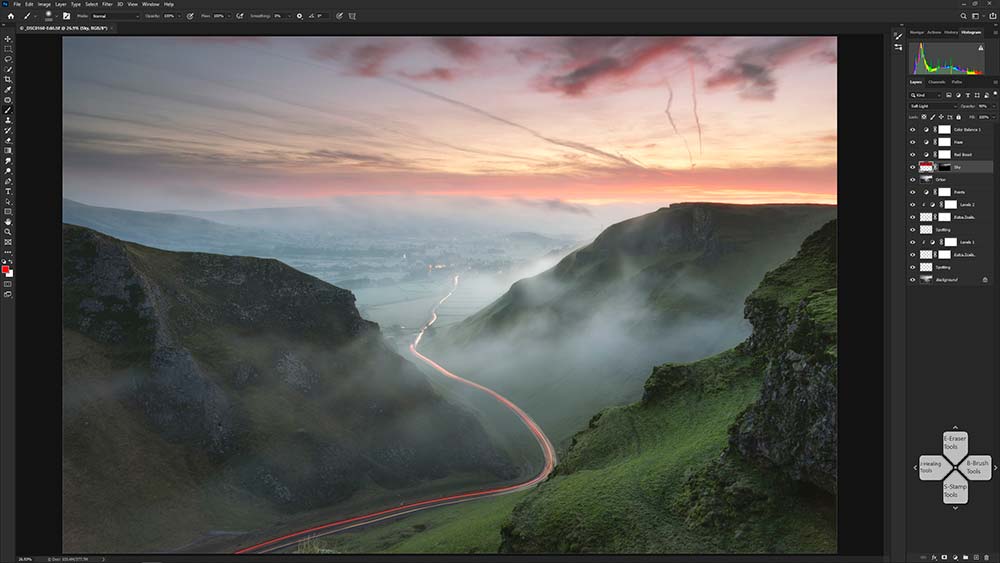
The HUD shows an on-screen graphical display of the D-pad, which is what’s used to access various tools and sliders depending on the editing software being used. By pressing other buttons on the TourBox, you can access further preset tools and sliders so there are several levels of control available.
It’s an extremely useful feature because the TTourBox controller doesn’t have any markings on the buttons, so you have to remember what each one does. This comes with time, but the on-screen graphical representation of the D-Pad is extremely useful. LCD screens on the device for each button and dial would be useful, but the reality of this is that it would increase the size and cost of the TourBox, so the HUD is the perfect compromise.
The HUD can be dragged into any position on the screen, and right mouse clicking allows you to access the settings where you can set the colour from the default light to dark, set size, opacity and even turn it off if you wish. It’s unobtrusive, so it’s worth keeping it visible as a visual reminder of the D-pad functions.
One point worth mentioning is that if you’re running a Windows PC and have an Nvidia graphics card with the GeForce Experience software installed, you’ll need to disable the in-game overlay because this can be activated by some of the TourBox controls and gets in the way of editing.
Verdict
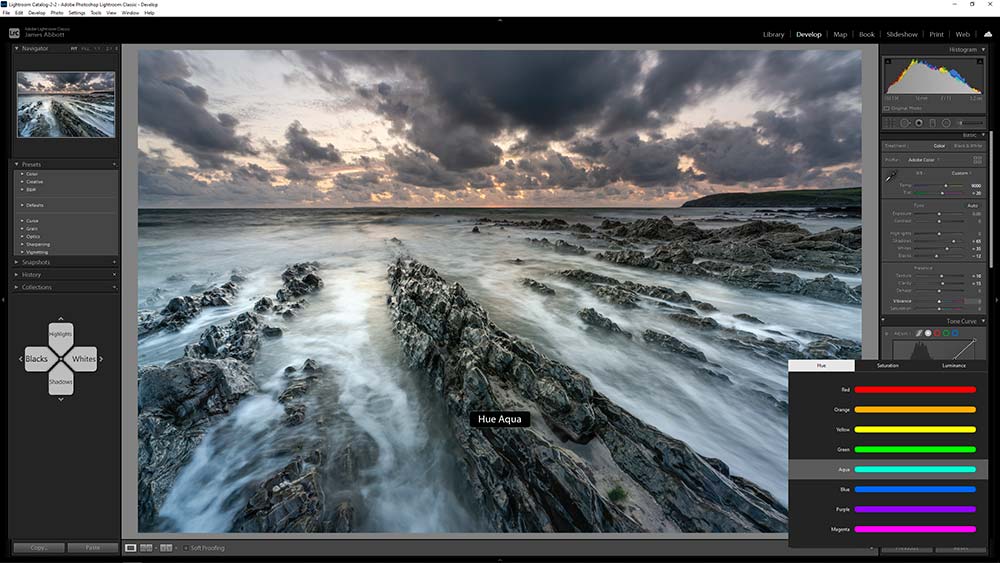
For photo editing, the TourBox is most effective in Lightroom due to the slider-based nature of the software. But it’s still a great controller for use in Photoshop and Affinity Photo because of the ability to select tools, apply shortcuts and control brush size, opacity and hardness etc.
The TourBox takes a little time to get used to because the buttons and dials don’t have any markings. This means that you have to memorise what each control does in the editing software that’ been mapped to the device either manually, using a preset or using a combination of the two.
Despite naturally taking a little time to get used to, once you do the TourBox undoubtedly helps to speed up photo editing and the dials provide a more intuitive way of working with sliders and brushes. The ability to simply hover the mouse pointer over a slider in Lightroom and use the dial to control the slider is incredibly simple yet highly effective.
At the time of writing the TourBox costs $169/£127 (on sale from $190/143), and free worldwide shipping is included. This makes it the most cost-effective controller for photo and video editing available, and at 116x101x30mm and 370g it’s also the smallest. At this price, and for what it does, the TourBox is a fantastic controller for both photo and video editing and is well worth consideration by photographers and videographers.
To learn more and to purchase the controller from the TourBox website click here
Use the code TB2020081402JA to receive a $10 discount
Improve your Photoshop and Lightroom skills with a 1-2-1 training session.
Check out my Photoshop tutorials on my blog, or visit my YouTube channel where you can subscribe to stay up to date with new videos www.youtube.com/jamesabbottphoto
To take a look at my landscape photography click here
Very interesting article, I didn’t knew this hardware could work with lightroom. Do you fell your workflow is substantialy improved?
Thanks, glad you enjoyed it. These controllers can speed up your workflow slightly, but are more about providing tactile controls when making adjustments compared using the software interface and your mouse or tablet.