There’s always more than one way to achieve an effect in Photoshop, but why use anything but the best? And for portrait and fashion retouching, that’s frequency separation retouching to maintain skin texture. Check out the video and written tutorials below…
If you’ve always wanted to be able to retouch your images like a professional retoucher, that dream is about to come true. The technique you need to know is frequency separation, and here’s how to set up the Layers you need, and how to use them.
At a basic level, frequency separation is about splitting different aspects of a portrait into two frequencies: low frequency covers colour and tone, while high frequency is all about fine detail such as skin. By working on these areas individually we can achieve the most realistic retouching possible.
Like many Photoshop techniques, this is one that can be taken too far and in the case of frequency separation, that means fake looking ‘porcelain’ skin. This occurs when you spend too long cloning out blemishes and imperfections, so to keep things looking natural and realistic it’s best to only remove the most noticeable blemishes and tonal imbalances.
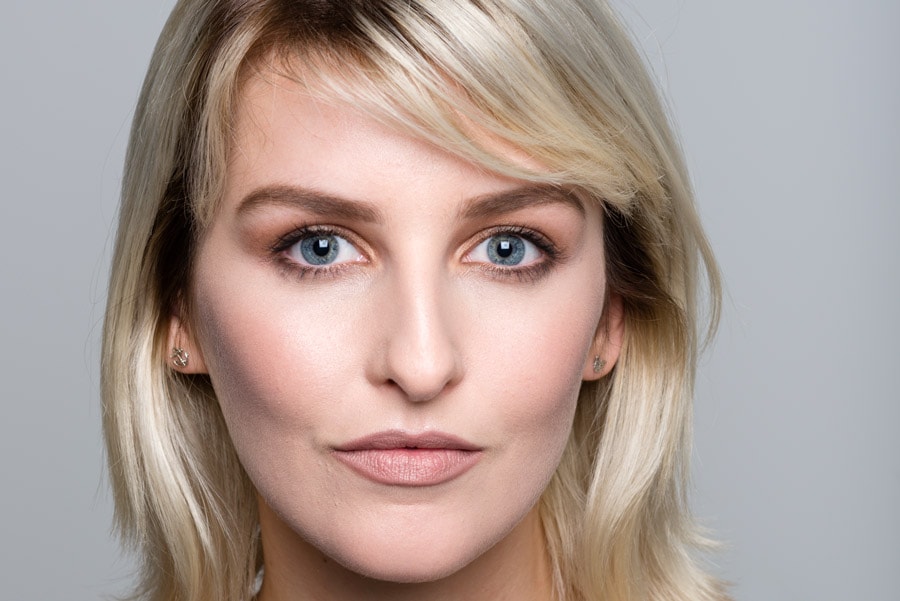
Before & after images
Before
After
Frequency separation video tutorial
Frequency separation tutorial
1. Duplicate the Background
Export your processed Raw file as a 16-bit TIFF – this is extremely important. Next, open the 16-bit TIFF in Photoshop and press Ctrl+J twice to make two copies of the Background Layer. Double click on the name of the Layer at the top of the stack and rename it ‘High Frequency’. Do the same with the middle Layer and call this ‘Low Frequency’.
2. Add Gaussian Blur
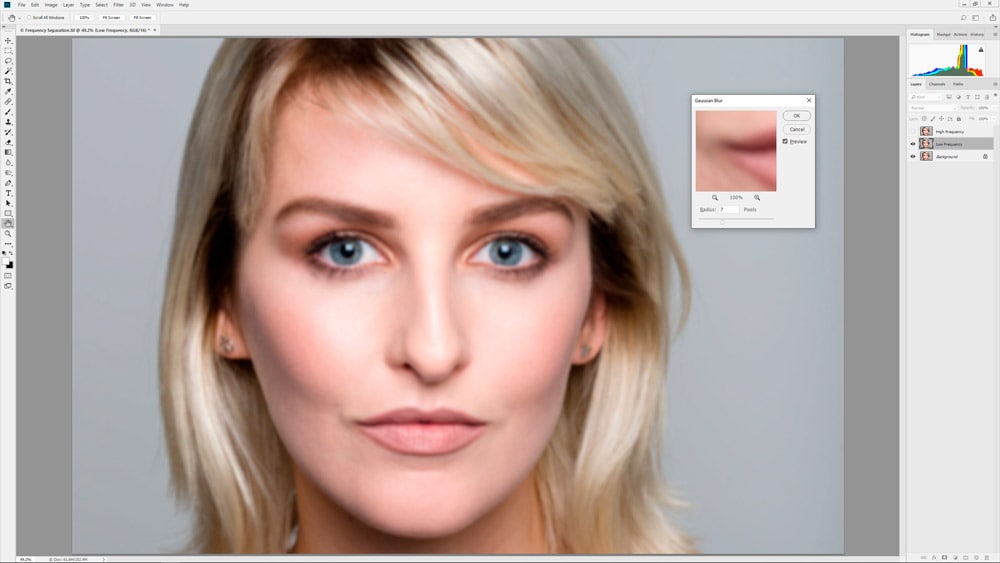
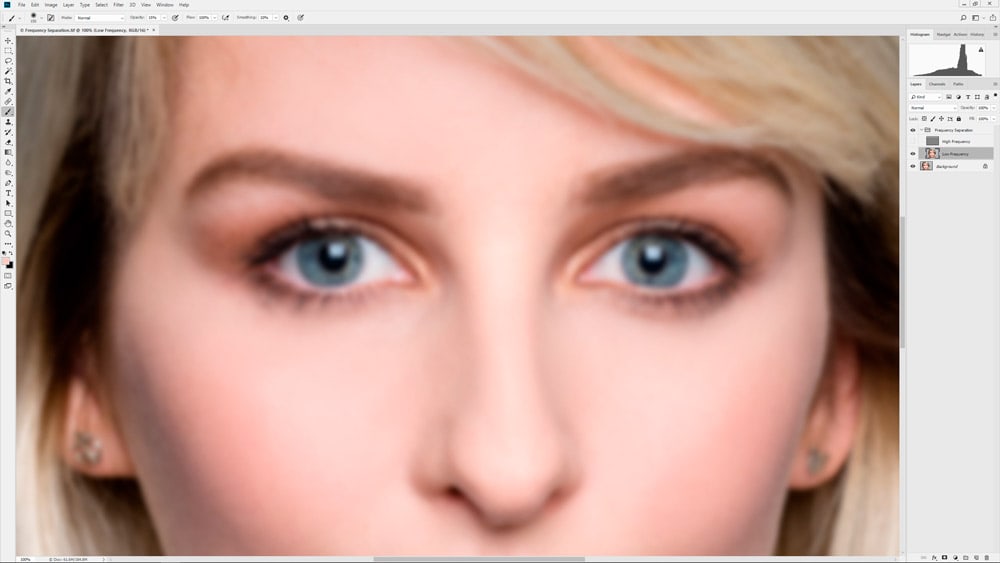
Switch off the visibility of the High Frequency Layer by clicking on the eye icon next to it on the Layers panel. Left mouse click on the Low Frequency Layer to highlight it and make it active. Now go to Filter>Blur>Gaussian Blur. You need to add a blur Radius between 5-10 Pixels – enough to blur out fine detail like skin texture. For this image 7 Pixels was perfect.
3. Apply Image
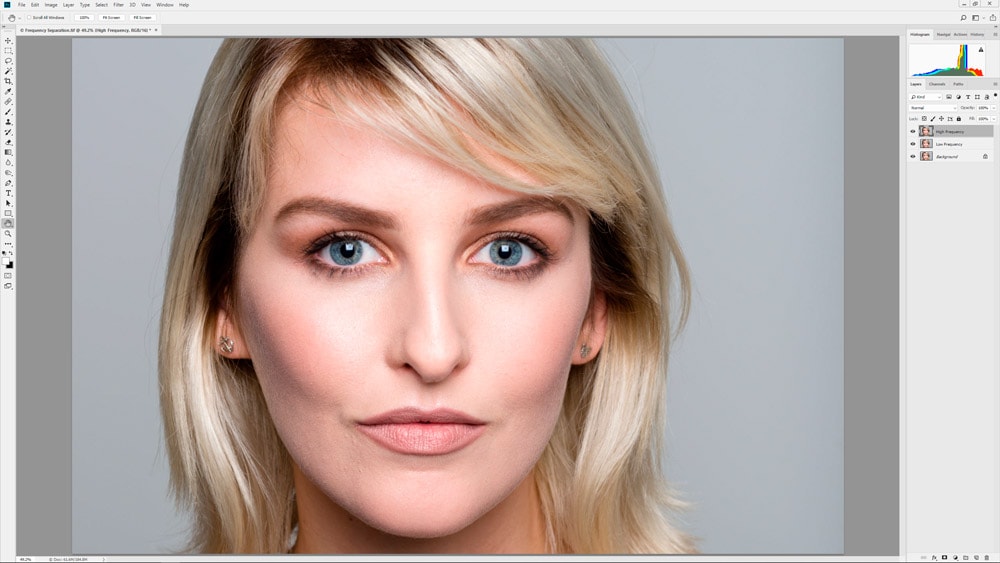
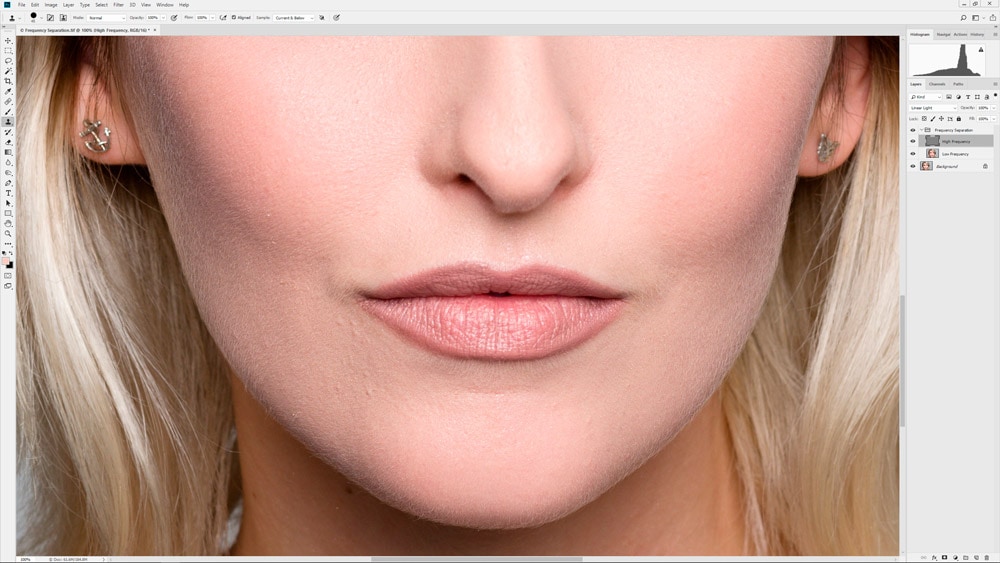
Switch on the visibility of the High Frequency Layer, and click on it to make it active. Now go to Image>Apply Image. When the dialogue box opens set Layer to Low Frequency, make sure Invert is checked, set Blending to Add, make sure Scale is set to 2 and Offset to 0 before hitting OK. Now change the Layer Blending mode from Normal to Linear Light.
4. Group Layers
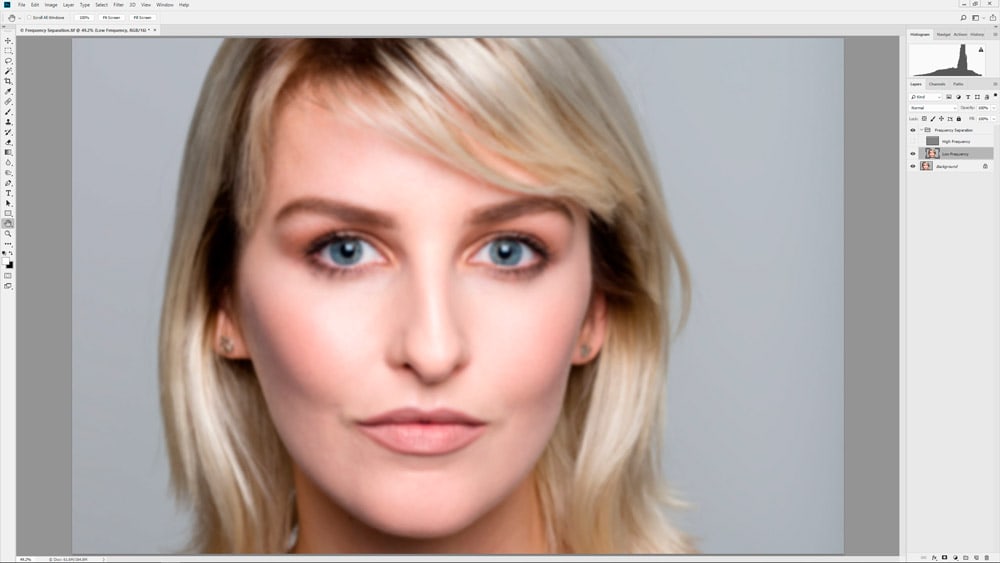
With the High Frequency Layer already active, hold down Shift on the keyboard and left mouse click on the Low Frequency Layer so both are highlighted. Now press Ctrl+G to group the Layers, double-click on the group name and rename it ‘Frequency Separation’. Expand the folder by clicking on the arrow, then turn off the visibility of High Frequency and make Low Frequency active.
5. Work on low frequency
Press B on the keyboard to activate the Brush Tool. Make sure it’s a soft-edged brush, Mode is Normal and Opacity is set to 15%. Now look for any areas of skin that are too light or too dark. Hold down Alt and left mouse click close to the offending area and then paint over it as many times as necessary. If you make a mistake use the History panel to go back.
6. Retouch high frequency
Switch on the visibility of the High Frequency Layer, and click on it to make it active. Select the Clone Stamp Tool by pressing S. Use the default settings but make sure the brush edge is set to hard, and Sample to Current Layer. Zoom into the image and sample close to blemishes by holding down Alt and left mouse clicking, then left mouse click over the blemish to clone.
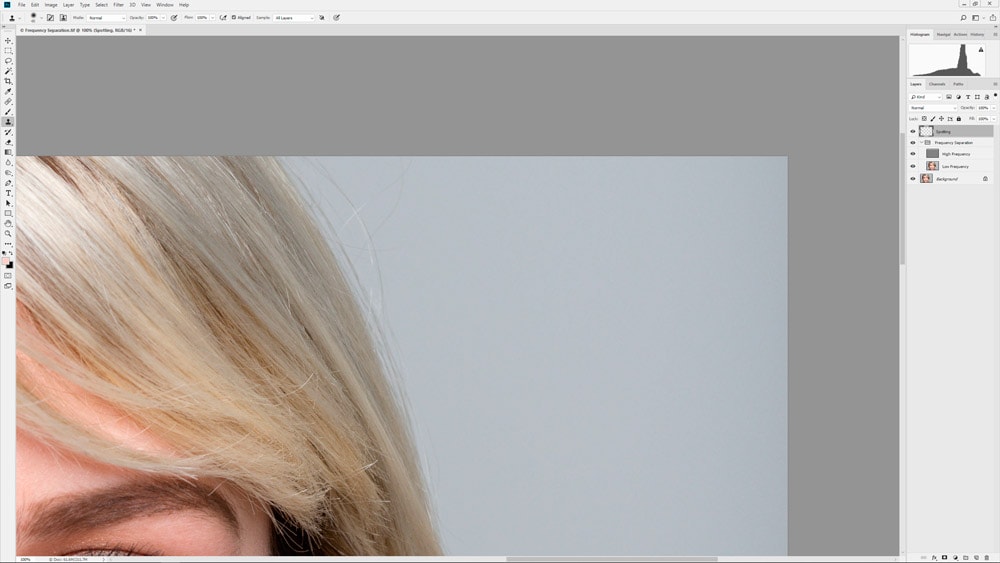
7. Standard cloning
For cloning out dust spots or problems areas on the model’s clothes or background, standard cloning into an empty Layer is best. Create a New Layer by pressing Ctrl+Shift+N, and select the Healing Brush Tool or Clone Stamp Tool. Make sure sample is set to Current and Below. For this image the Clone Stamp Tool was used to clone out flyaway hair on the plain grey background.
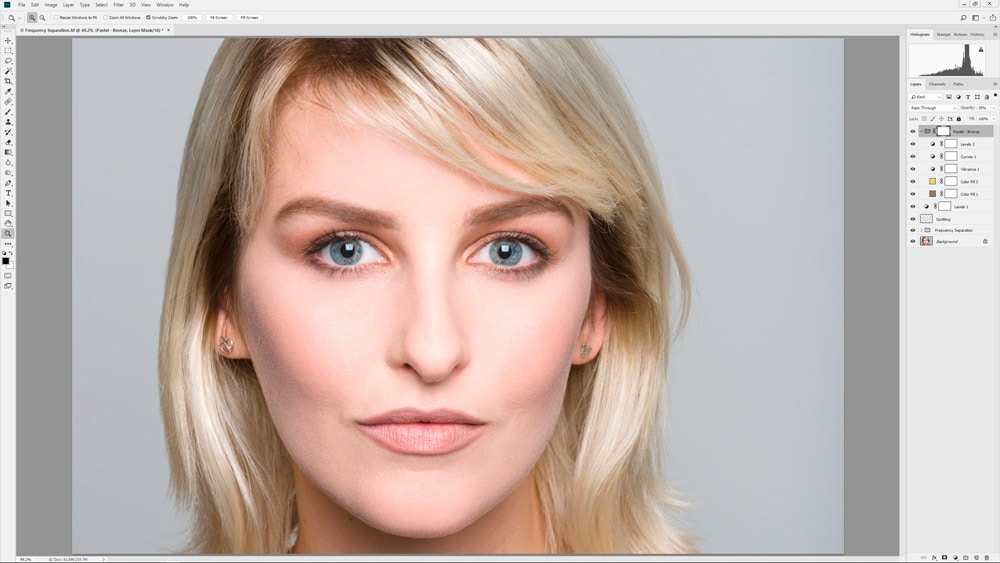
8. Process and Flatten
Once you’ve finished retouching you can apply any adjustments as required. These are best applied using Adjustment Layers to maintain a non-destructive workflow. When you’re completely happy with the image, you can flatten the Layers by going to the menu represented by four horizontal lines at the top of the Layers panel and select Flatten Image.
Correct sampling when cloning
When using the Clone Stamp Tool or Healing Brush Tools in a normal cloning situation, it’s common to create an empty New Layer to clone into. And when doing this you have this Layer above the Background Layer and set the Tool Sample source to Current & Below.
This method is absolutely correct for this type of approach, but with frequency separation this will cause problems. With this technique the Layers that are created are linked and work together using Apply Image, so when using the cloning or healing tools with either the high or low frequency Layers, it’s imperative that Sample is set to Current Layer. Failure to do this will result in severely mismatched cloning.
Improve your Photoshop and Lightroom skills with a 1-2-1 training session.
Check out more of my Photoshop tutorials on my blog, or visit my YouTube channel where you can subscribe to stay up to date with new videos www.youtube.com/jamesabbottphoto
To take a look at more of my landscape photography click here

