Super Resolution is a new feature that was introduced in Adobe Camera Raw 13.2, and in a nutshell it provides a way of doubling the resolution of images; the height and width of a Raw file, JPEG or TIFF can be doubled to provide four times the original resolution. Let’s take a look at how to use it with Raw files in Adobe Camera Raw, and ask the important question – is Super Resolution actually any good?
In a post on the Adobe blog, Eric Chan, Senior Principal Scientist on the Adobe Camera Raw explained: “Today I am thrilled to introduce our second Enhance feature: Super Resolution. The term ‘Super Resolution’ refers to the process of improving the quality of a photo by boosting its apparent resolution. Enlarging a photo often produces blurry details, but Super Resolution has an ace up its sleeve — an advanced machine learning model trained on millions of photos. Backed by this vast training set, Super Resolution can intelligently enlarge photos while maintaining clean edges and preserving important details.”
At the time of writing Super Resolution is only available in Adobe Camera Raw through Photoshop, but Adobe has announced that the feature will also be available in Lightroom and Lightroom Classic soon.
Check out the video for a quick tutorial on how to use Super Resolution with a comparison of the results from a couple of Raw files, and scroll down for a comparison of the same images with a final verdict.
Super Resolution tutorial & image quality
To use Super Resolution, open the image by selecting File>Open and selecting the desired Raw file which will open in the Camera Raw dialog window by default. If you’ve set your computer to open Raw files in Photoshop when double clicked this will work too.
To open JPEGs or TIFFs, go to Edit>Preferences>Camera Raw and in the File Handling tab, set JPEG or TIFF to Automatically open all supported JPEGs or TIFFs. Super Resolution isn’t available in the Camera Raw Filter.
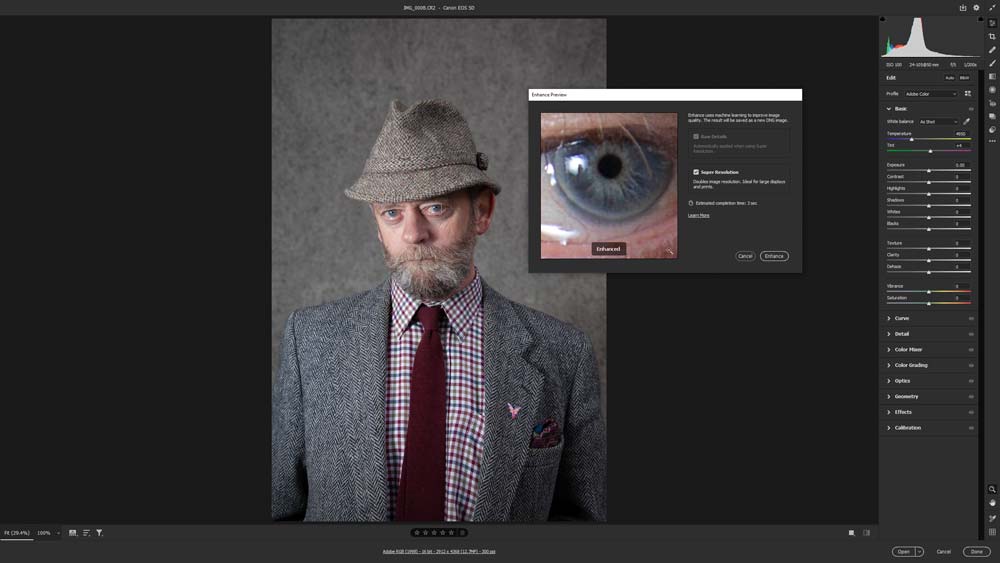
Once an Image is open in Adobe Camera Raw, right mouse click on the image in the image window and click on Enhance. When the Enhance Preview dialogue box opens click on the Super Resolution check box to make sure it’s selected and click on the Enhance button. The new DNG file that’s created can be found in the original folder once Photoshop has enlarged the image.
Super Resolution example images
In this portrait taken on a Canon EOS 5D (MKI), the enlarged image looks fantastic and the resulting DNG file appears to be sharper than the original. This is certainly an example of the feature creating an excellent result, but this isn’t always the case. The original image is on the left, and the enlarged version on the right.

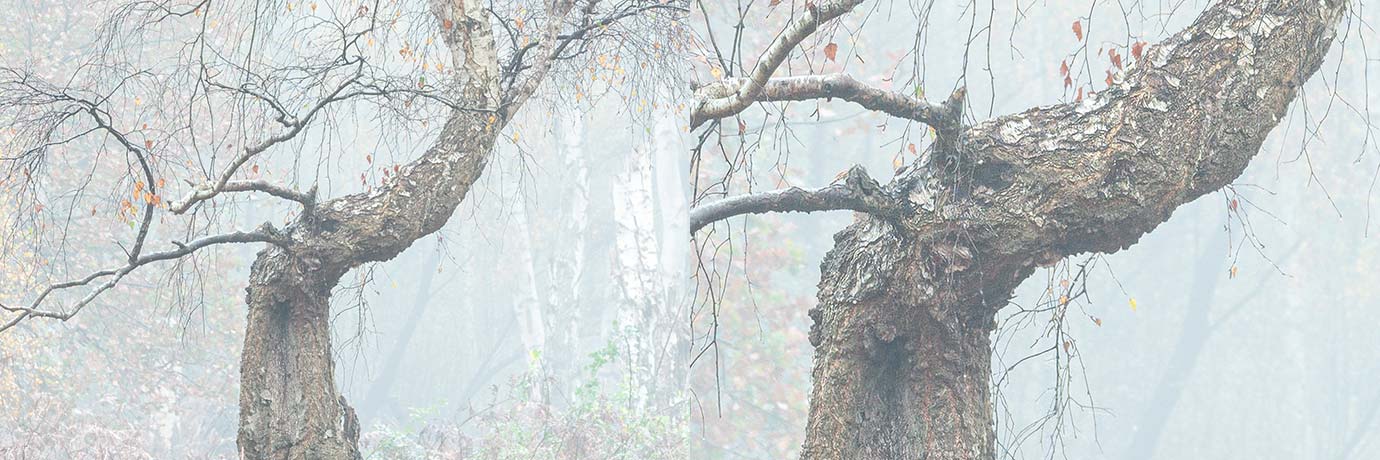
With the woodland image taken on a Sony A7RIII, detail in the tree appears over sharpened and it looks like artefacts are beginning to appear because of this. A portrait taken with the same camera showed a much better and certainly usable result. The Super Resolution version below is shown at a greater magnification so you can clearly see the negative result that’s visible at 100%. The original image is on the left, and the enlarged version on the right.

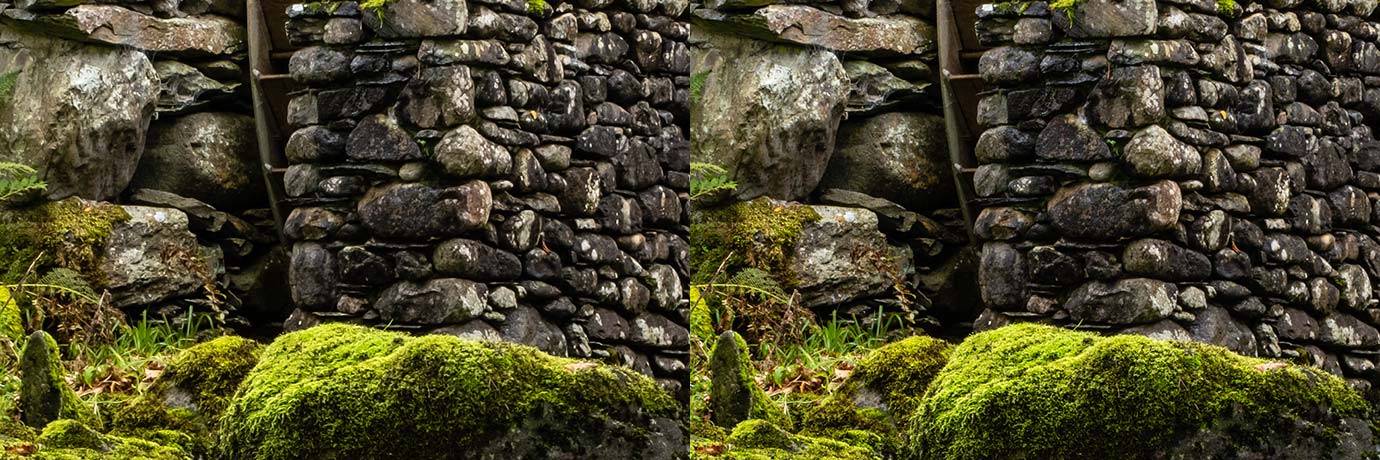
Raw files taken on a Fujifilm X100V were, however, consistently good across subjects. Fujifilm APS-C Raw files do have a slightly waxy look to them, even when shot at ISO 100. So, perhaps this feature of them which is a result of the sensor configuration used by Fujifilm helps them to work well with Super Resolution. The original image is on the left, and the enlarged version on the right.

Super Resolution verdict
Super Resolution is indeed an exciting new feature that can produce amazing results in some situations, but not so great with others. I tested the feature with a range of different Raw files from different cameras with a variety of resolutions, and the results were generally inconsistent; in some images they were amazing, and in others details looked over sharpened with artefacts becoming visible.
Over time the artificial intelligence used to perform the interpolation of images using Super Resolution is likely to improve, but for now the inconsistent results mean it’s worth testing the feature with images but only using the enlarged version if the results are satisfactory. When it works well the results are amazing, but when it doesn’t the image quality of Raw files appears to suffer considerably.
The Digital Darkroom: The Definitive Guide to Photo Editing
 My new book, The Digital Darkroom: The Definitive Guide to Photo Editing is now available. Photo editing is a vital part of the image-making process. Just as darkroom techniques were important skills to learn in the days of film, a clear understanding of post-processing is now key to getting the most out of your digital pictures. Easy to follow and accessible for readers of all levels of knowledge, The Digital Darkroom is the definitive guide to post-processing for users of Adobe Photoshop and Affinity Photo.
To find out more and order your copy click here
Improve your Photoshop and Lightroom skills with a 1-2-1 training session.
If you enjoyed this post you can support this blog on Ko-fi here
Check out more of my Photoshop tutorials on my blog, or visit my YouTube channel where you can subscribe to stay up to date with new videos www.youtube.com/jamesabbottphoto
To take a look at my landscape photography click here
